
This has been done before. You can build a render farm the expensive way by buying a 'rack' system. But that adds up. Or you can do it the crazy way where you make a home made render farm. That's the path I chose. It's cheap and it's got style!
So a friend of mine tipped me off to this idea. Basically you get a cool little Ikea drawer cabinet called the Helmer and you stick sheets of cardboard or whatever at the base of the drawers and you put your motherboard on top of it with all its components. It's a genius idea and people have been doing iterations of this for a while. The problem I was running into, though, was that unlike the other Helmer builds I had seen, I wanted to overclock mine. This meant more space was required for the cooler. Also I had trouble finding a 7.6" wide MicroATX motherboard that could overclock well.
I currently run a home built desktop that sports a 2600k and an EVGA 580, both watercooled. I thought about doing that but the logistics of pulling drawers in and out with that stiff, 3/4" tubing nixed it for me. Also there was the cost of the waterblocks, the radiator, etc. I wanted to keep this cheap!
To start out with, let me show you a picture of the Helmer in it's stock, unmodified condition:
 |
| Ikea Helmer http://www.ikea.com/us/en/catalog/products/40107872/ |
Fortunately for me my dad is an amateur machinist. Over Christmas break I mentioned to him that I was trying to resolve some issues with how I was going to fit all my nodes in the cabinet and get all the parts and pieces to fit. I also mentioned that I wanted to overclock and was thinking of reducing the density from 6 nodes per cabinet to 3. My thought was since the cabinets are so cheap, better to increase the value of your nodes by overclocking even if it means losing space. So we settled on 2 drawers per node giving us 3 nodes per cabinet.
Here are some pictures showing the process:
 |
| Drilling the holes for the shelf rails |
 |
| Making sure the spacers are all the same length |
 |
| The beginnings of a node. |
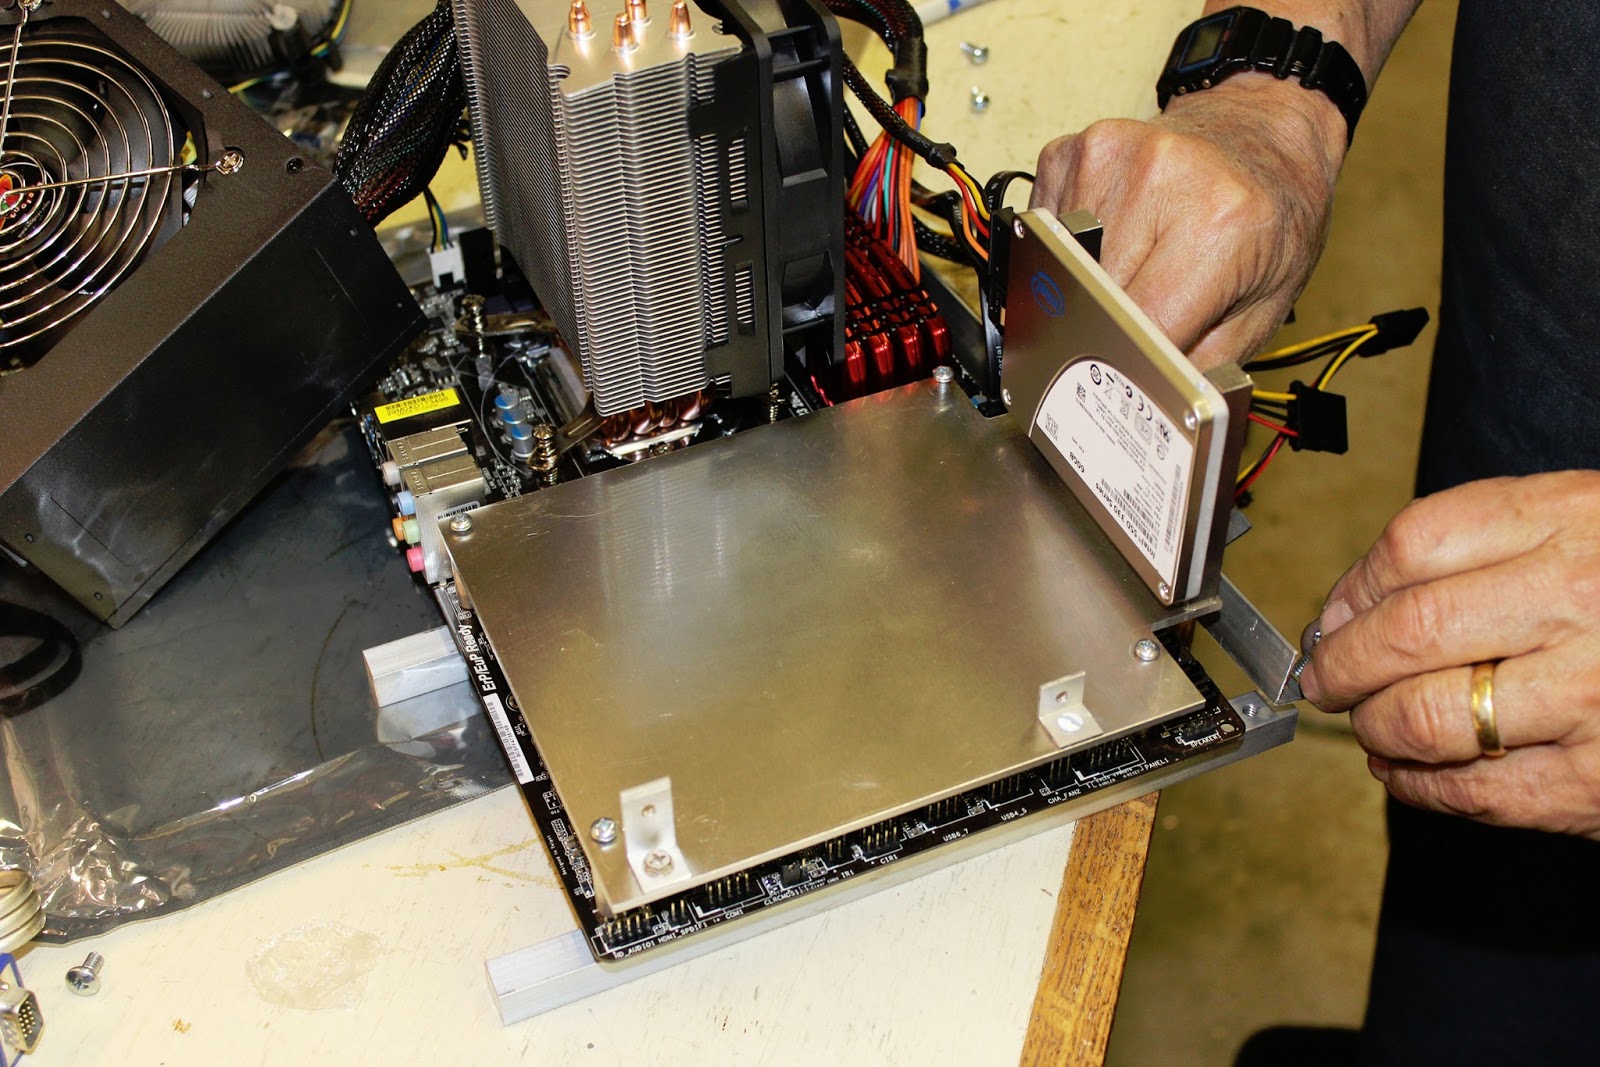 |
| The power supply goes on that plate and the hard drive is mounted on its side from columns. |
 |
| A node on its side showing horizontal rails and the angle iron used to stiffen it. |
 |
| All the pieces needed for one node 'shelf' |
 |
| We took out half the rails and lined the remaining ones with wood |
 |
| They are dense little suckers! |
 |
| We used these buttons for the power switch. For a connector we spliced into the fan connector from the stock intel cooler. It was able to slide over the front panel pins. It's 4 pin and the power switch on the motherboard is only two but it overhung the edge so all was well. |
 |
| It's a tight fit! |
 |
| The beginning of something good! But we needed air movement and filtration. What to do?? |
 |
| On one of our many late night excursions to Home Depot for supplies we spotted this. The idea was to slice and dice it and turn it into filters for every other drawer front. Then the fans could go in the back of the cabinet. Web Absorber: http://www.homedepot.com/h_d1/N-5yc1v/R-100011568/h_d2/ProductDisplay?catalogId=10053&langId=-1&keyword=carbon+air+filter&storeId=10051#.UO-zbye5Nec |
 |
| So we had to cut out the front of the drawer fronts. An easy job with a vertical mill and an 1/8" endmill bit. |
 |
| After some bandsawing and trimming this is the basic idea. The aluminum rails not only hold in the filter material but attach the lower draw front to the upper (we're doing two drawers per node, remember.) |
 | ||||||||
The air filter and the button.
So that's it! That's the Helmer as a ridiculously deluxe render farm. It was a three week process, but a lot of that was the 'invention' of this beast. There are a huge number of problems to be resolved when you actually start the project. Also both my dad and I got colds during that time, did holiday related activities, built furniture, chopped firewood, etc. So it wasn't our full time job in other words. Feel free to post comments with questions or feedback. My render time now has dropped to 1/3 of what it was. I expect it to drop to 1/4 when the third node is complete. If you feel like donating the CPU, HDD and Ram for the last node don't hesitate to let me know....
And for your convenience, here is a list of typical hardware per node:
Hardware List:
Asrock Z77 Pro3 Motherboard
Intel 2600k oc\ed to 4.5ghz
Intel 330 60gb hard drive
32gb Ripjaw Ram
Cooler Master 212 Plus CPU cooler
Lots of Cooler Master Case Fans
A basic Gigabit Switch
A basic 550watt power supply
|


We, Ultrarender propose renderfarm, a progressed and a towering exhibition PC framework that
ReplyDeletepermit you move toward getting enlivened visualizations and additionally empowers speedy and adequate
rendering.
This is awesome - I've seen others online and am interested to make one myself - can you tell me what software you're running for your render management system and OS?
ReplyDeleteI was thinking to go for an open source one with Mac OS X
Hi Graham - Thanks! I've been loving it. I'll be posting some work I've done with it pretty soon. I just am finishing up my thesis (video + renders) and it's been a huge help. 32 threads working is a sight to see.
ReplyDeleteI'm on Windows 7 running Max + Vray (both educational.) I administer render jobs using Vray's built in distributed rendering service. It's super robust. If one node crashes (or wasn't running), you just fire it up and it automatically jumps in.
I had originally thought of making the shift to something like Blender and going all open source with OS and everything. I may explore that this summer.
What size drill bit did you use when milling the hole pattern in the back?
ReplyDeleteHi Jason - It's a 5/8" bit. It works well, it's just a bit tedious.
ReplyDelete